Anatomy & Character Sculpture: Exercises
01.09.22 - 06.10.22 (Week 1 - Week 6)
Chai Yi Xuan / 0346645 / B'
Creative Media
Anatomy & Character Sculpture / Entertainment Design
Exercises / Fundamentals of Anatomy & Digital Sculpting
INSTRUCTIONS
To-Do List:
- Study basic anatomy
Week 1
For the first week of the class, we are told to study posture and block them out. We are recommended to study real life people, but we are free to draw fictional characters as well. I got most of my references from line-of-action.com since they have a lot of poses available to study. I used to draw characters before, but not in realistic proportions, so it was a little jarring for me to block them out. It took me a few drawings to get used to the proportions.
 |
| Figure 1.1: Posture studies #1 |
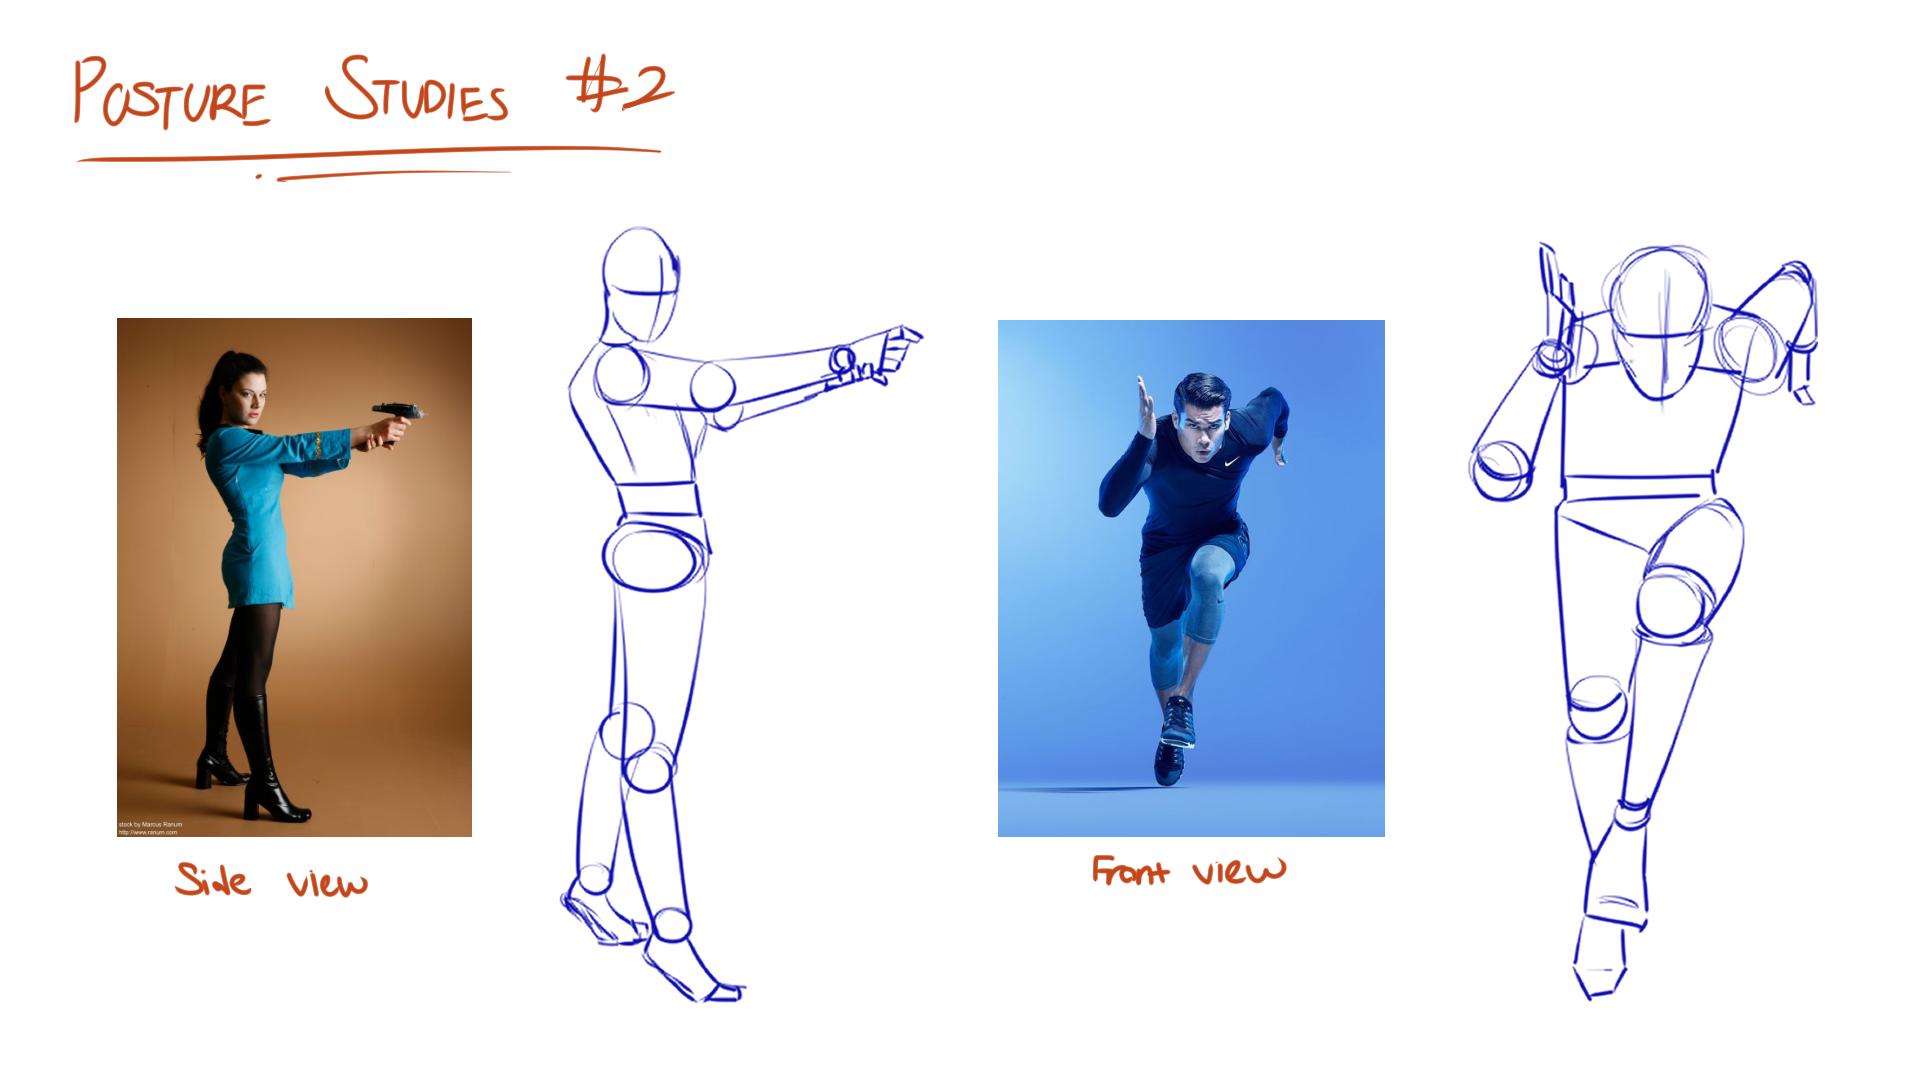 |
| Figure 1.2: Posture studies #2 |
 |
| Figure 1.3: Posture studies #3 |
Week 2
On week 2, we go for the base structure of a human— the skeleton. The main goal of this exercise is to block out the structure of a skeleton and understand how it works. I have drawn a few skulls before, but they mostly turned out to be very simplistic or inaccurate. And now that I have to draw the entire skeleton, I felt like it was too much for me. At first, I drew up all the details of the skeleton (like each bones of the ribcage, etc.). After a consultation with Mr Kannan, I realised I only had to draw out its general shape and indicate where the bone protrudes or extrudes. The assignment became a whole lot easier then.
 |
| Figure 1.4: Skull studies |
 |
| Figure 1.5: Skeleton studies |
Week 3
We started to dabble in 3D modeling. For this module, we would be learning ZBrush which is one of the lighter 3D modeling programs. Mr Kannan showed us the basic controls and shortcuts for the more common brushes in the program in class. Then, we are to model a head bust as practice.
I did a 3D model once in Blender for a previous assignment, though it turned out weird looking and sad. I was not familiar with the controls of that program, so learning the commands of ZBrush is easy. Though the sculpting process leaves a lot to be desired. Despite the tutorial in class, my head bust turned out to be dissatisfactory to me— though infinitely better than the first ever model I have done.
 |
| Figure 1.6: 3D modeling practice, head bust |
Week 4
For this week, we have to study torso and muscles. After having done the blockout for posture and skeleton studies, it became easier for me to visualise anatomy as basic shapes. Mr Kannan's advice of seeing the bigger picture is starting to stick, and it made the assignments a little more bearable to do.
 |
| Figure 1.7: Torso studies |
Learning the names of muscles is hard, mostly because I'm bad with scientific names and this is my first time actually studying individual muscles. Even after this exercise, I couldn't remember anything beyond a deltoid and a tricep— though hopefully I can slowly learn their names as I continue to draw.
 |
| Figure 1.8: Muscle studies |
Aside from studies, we have to practice sculpting. This time we have to sculpt the base of a skeleton like a blockout. I was still bad and unfamiliar with 3D modeling, so my skeleton didn't really look natural. At the very least I had the basic silhouette of it.
 |
| Figure 1.9: 3D modeling practice, skeleton |
Week 5
The remaining studies left were hands, feet, head and expression studies. I tend to draw stylised proportions, so again having to drawing in more realistic ones feels weird for me, though I understand that learning real life anatomy is essential understanding how human body works. One of my weaknesses in anatomy is hands and feet, so having to study it was pretty much an eye-opening experience, and I feel more confident is drawing them.
 |
| Figure 1.10: Head studies |
 |
| Figure 1.11: Hand studies |
 |
| Figure 1.12: Feet studies |
The expression studies were also a little tough for me, since I have to understand what muscles moves or where the skin creases when a person makes a face. I've only done a little study, but I think that I've learned a little more about drawing expressions.
 |
| Figure 1.13: Expression studies |
For the last modeling exercise, we have model the muscles to show our understanding of them. Mr Kannan told us to sculpt on the skeleton model we have already done. I looked up on a few references for sculpting muscles and got to work. I managed to model something, though the quality of it is definitely something of a newbie level. I am still getting used to ZBrush and modeling in general, so I really shouldn't expect to sculpt a good quality model in a short period of time. Well, practice makes perfect, as they say.
 |
| Figure 1.14: 3D modeling practice, muscles |
PDF presentation file for Exercises
FEEDBACK
Week 6
Posture studies is okay, but can add a curve around the chest area to mimic a ribcage. Skeleton and skull studies are good, but make the areas that protrude and extrude more obvious. All other studies are okay. For sculpting, the skeleton arms and legs are not going to be super straight. There will be some slight bending as we can never stretch our limbs as straight as a line. The same applies for muscle sculpting as well.
REFLECTIONS
Starting this module, I knew it would involve a lot of studying of the human body. Before this, I tend illustrate in stylised proportions, and even then some things are a little off. I could never quite point out the problems, so I ended up repeating some of the same mistakes. This assignments made sit down and truly observe the real proportions of a human body. Paired with the pointers and feedback from Mr Kannan, I slowly learned how to identify my own mistakes in my previous artworks. With this newfound knowledge, I can better draw anatomy for future assignments and for personal artworks.


Comments
Post a Comment